Two quick tweaks for 3D Printers running RAMPS and Marlin
Tweak 1: Get a better 5V regulator
Your Arduino Mega uses a bog-standard 7805 voltage regulator to reduce input voltage (12 volts, for most RAMPS printers) to 5V for your peripherals. This regulator gets very hot when you try to power too many accessories. I'm running an SD card reader, an LCD screen, and a BLTouch probe, and sometimes that's enough to raise the heat to concerning levels.
The tweak: remove the 7805 chip with flush cutters or a heat gun and replace it with an efficient buck converter, such as the Pololu 5V, 500mA Step-Down Voltage Regulator D24V5F5. I love these little things. You could even go with a higher-current module if you had a LOT of accessories, like RGB LED strips. All you need to do is match GND on the module with Pad 1 on the ex-7805 footprint, VOUT with Pad 2 or Pad 4 (either one is fine), and VIN with Pad 3.
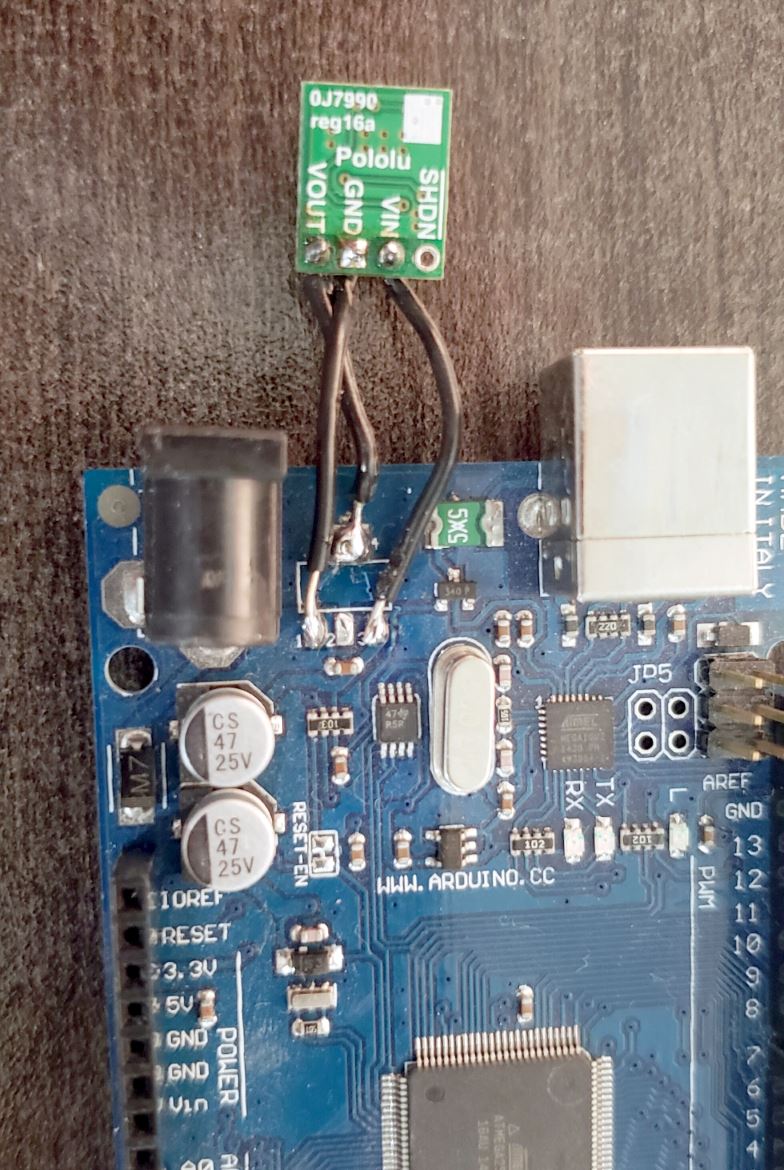
I let the new regulator "float" off the Arduino in case I had to add a heatsink, but it stays nice and frigid.
Tweak 2: Swap out your Power MOSFET before everything melts
RAMPS 1.4 was designed when print beds were much smaller, and heated beds drew much less power. My print bed isn't that big, but it already strains the abilities of the un-heatsinked power MOSFET on my RAMPS board. If left untouched, you risk overheating and irreparable damage to your board.
The tweak: by design, this MOSFET is a STP55NF06L, and this is fine for driving your cooling fan or for most hotends. For heated beds, though, it's not good enough. Replace it with an IRLB8743PBF or an IRLB3034PBF and be sure to attach a heatsink! You may need to bend the legs of the MOSFET into this goofy "Z" shape to fit a heatsink comfortably, but it's well worth the fuss.
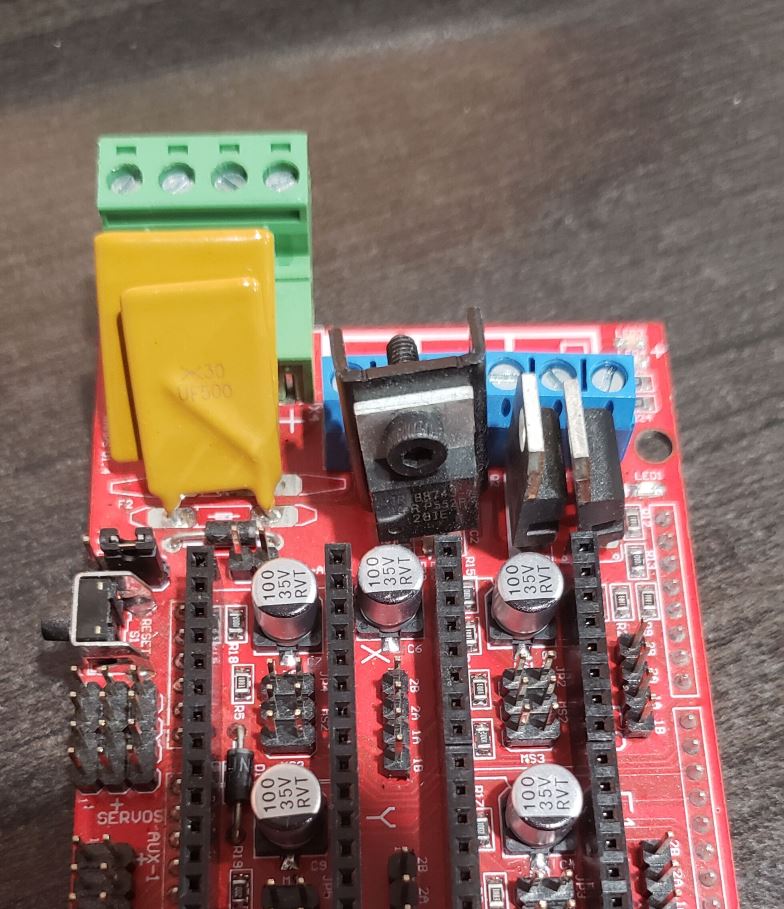
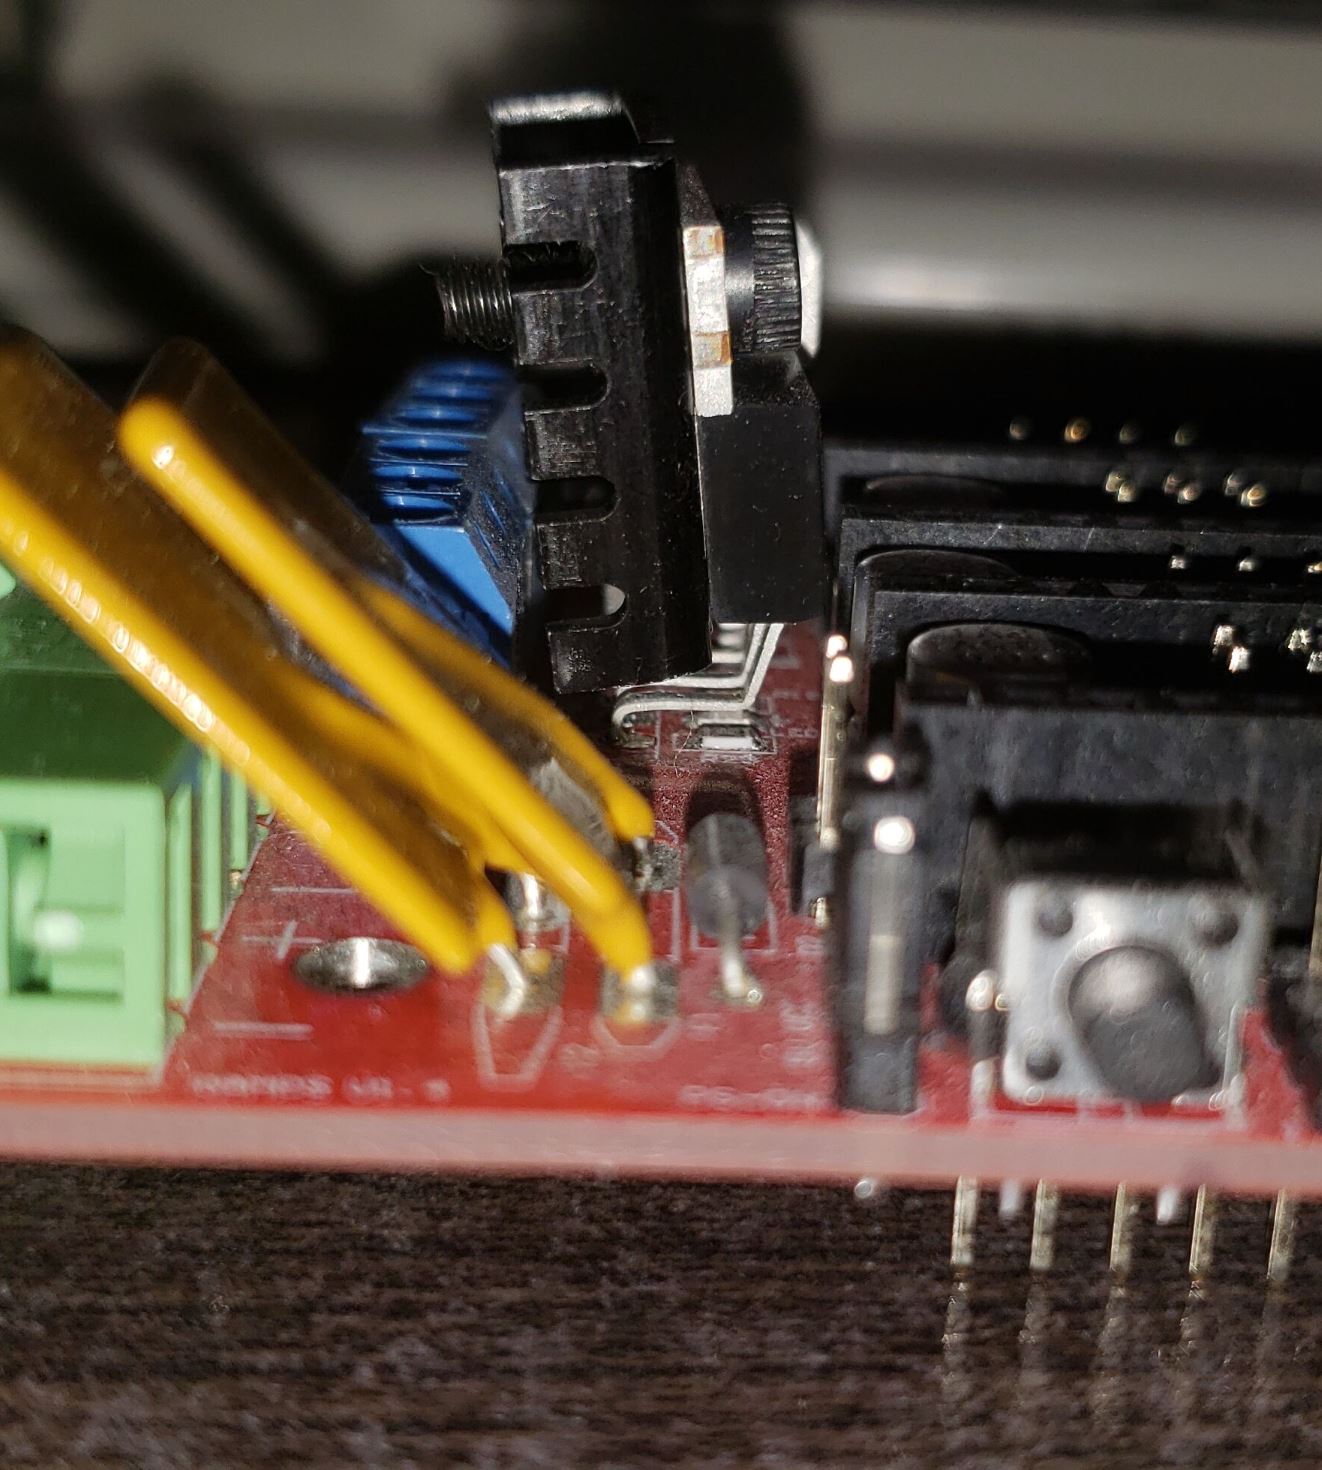
On this second pic you can see the way I had to bend the legs to make the heatsink fit. Worth it!